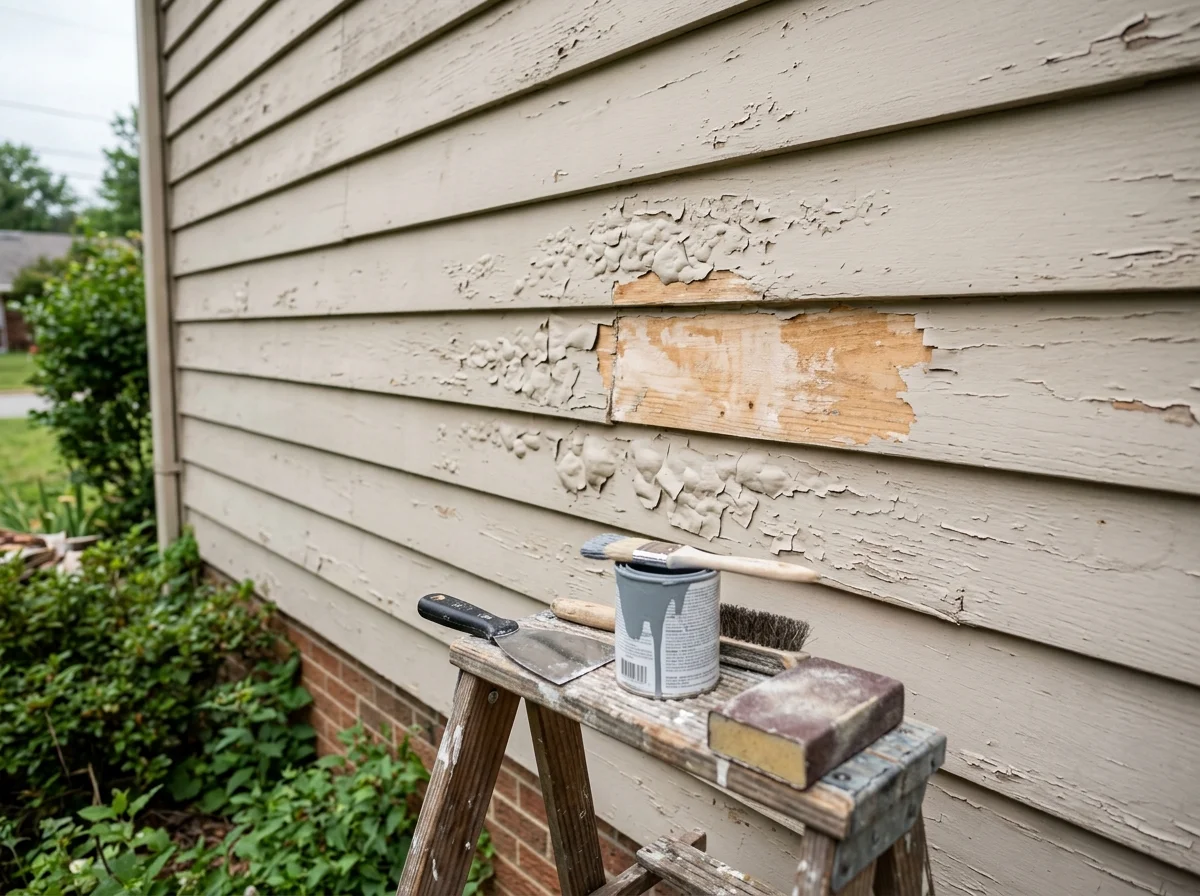
Take a walk around your house sometime, and you’ll probably spot it before you even think to look for it: little bumps or raised patches sitting right on top of the paint. That’s blistering. Not the same thing as paint cracking from age, though people mix the two up all the time. Something underneath is pushing hard enough to lift the paint clean off the wood or siding. Fixing exterior paint blistering the right way means figuring out what’s doing that pushing, not just scraping off whatever you can see and calling it done. Cleveland doesn’t help matters either. Between the temperature swings, the summer humidity, and how much moisture just sits in the air here, the conditions are pretty much built for this kind of thing.
That’s where this article is headed. What blistering actually looks like up close, what’s usually behind it, and how the repair actually gets done, start to finish.
Spotting Blistering Paint Before It Spreads Further
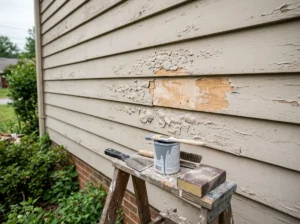
Picture small domes or raised pockets sitting on the surface, like the paint is trying to peel itself off the wall from the inside out. Some blisters rarely get bigger than a pea. Others spread across most of a siding board before anyone notices. Press one with your finger, and it might feel soft, even hollow, which tells you there’s air, gas, or moisture caught somewhere between the paint and whatever’s underneath it.
Peeling is a different problem. That’s paint coming off in long strips after it’s already cracked and given up its grip on the surface. Exterior paint peeling can have many of the same underlying causes, including moisture, poor surface preparation, and application problems. Blistering can occur before peeling, but the two problems do not always follow the same progression.
Why Exterior Paint Bubbles Up In The First Place
At its core, blistering is gas or liquid trying to escape from under the paint and finding nowhere to go. A handful of conditions tend to be behind most cases, though what’s actually going on on your particular wall depends on the specifics of that spot.
Moisture Behind The Surface
Water gets behind painted surfaces more often than people assume. Maybe a sprinkler’s been hitting the same patch of wall for years, or a gutter overflows every time it rains hard, or the ground slopes the wrong way and sends runoff straight toward the foundation. However, it gets there, and that trapped moisture eventually tries to evaporate back out, pushing against the paint film from the inside until a blister forms right where the pressure is worst.
Heat And Sun During Application
Paint applied to a surface that is too hot or exposed to direct sun can dry unevenly and lose its adherence. Depending on the coating and application conditions, heat can contribute to blistering or other bubbling problems. Walls facing south or west catch this more often, simply because they take the brunt of afternoon sun while a painter’s still working.
Surface Preparation Problems
Skip the prep work, and it usually shows up later. Paint applied over a damp wall, or over dirt, mildew, or an old coat already failing, doesn’t have much to grab onto. That weak bond might hold through the first season, but once the wood starts expanding and contracting with the seasons, blistering is often how the shortcut finally catches up.
Reading The Clues: What Blister Location And Size Suggest
Where the blisters show up, plus their size and what’s inside them, can point toward a likely cause. It’s not a guaranteed diagnosis, but it’s a solid starting point, and there’s no reason a homeowner can’t use the same logic a painter would before picking up a scraper.
| What You Notice | Possible Cause | What It May Mean |
| Blisters near bathrooms, kitchens, or laundry vents | Interior moisture escaping through the wall | Household humidity may be pushing outward |
| Blisters mostly on south- or west-facing walls | Heat and sun exposure during painting | The coating likely dried too fast during application |
| Blisters near ground level or below windows | Water reaching the wall from outside | Drainage, grading, or a leak could be the source |
| Blisters that contain or release moisture | Moisture-related blistering | Moisture may still be present behind or within the painted surface |
| Blisters that are dry and hollow inside | Possible heat or application-related problem | The coating or application conditions may have contributed |
| Rolling paint over an active blister won’t fix it. Whatever’s trapped underneath is still there. If the underlying cause remains, the blistering can return through the new coating. |
Should You Remove Blistered Paint Before Repainting?
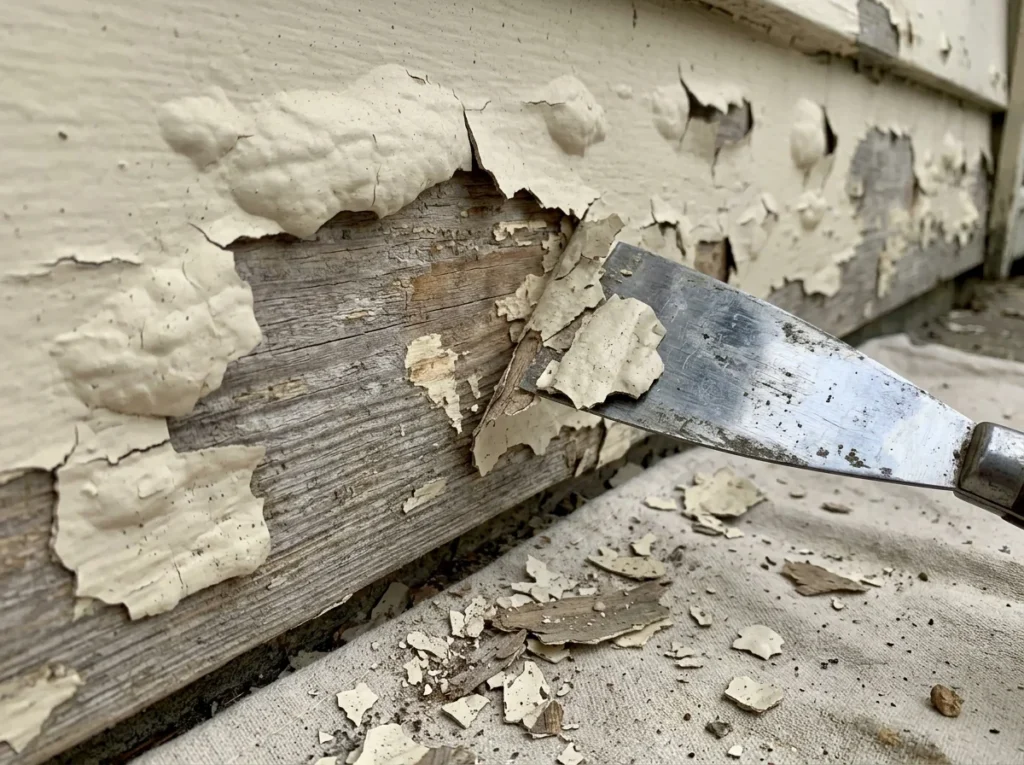
In most cases, the answer is yes. Painting over blistered spots is a common shortcut, mostly because it feels faster than dealing with the real problem, but the issue underneath hasn’t gone anywhere just because it’s hidden again. Those same spots tend to come back bigger than before.
A few signs mean it’s time to remove rather than touch up:
- More than a couple of isolated blisters in the same area
- Soft or spongy wood when you press near the blister
- Paint that flakes or lifts easily along the edges
- Blisters that have grown or multiplied since you first noticed them
A single dry, stable blister tied to old application conditions isn’t the same risk as one sitting over damp wood near a leak. Check the substrate before deciding either way. Guessing wrong here just means doing the work twice.
How To Repair Blistered Exterior Paint
What you see on the surface is usually just part of the story. A repair that actually holds addresses the coating, the wood or substrate underneath it, and whatever pushed the paint up to begin with.
- Inspect the blister and surrounding area. Press or open one up and see whether it’s damp or dry. Check the wood underneath too, feeling for softness or looking for discoloration.
- Address the underlying cause where you can. A leaky gutter, a misaimed sprinkler, bad grading—whatever’s sending water toward that wall needs fixing now, or the repair won’t last.
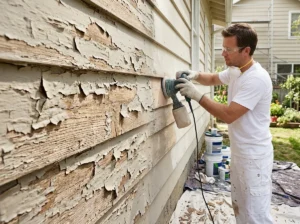
- Remove the failed coating. Scrape past the blister until you hit paint that’s still solidly bonded. Feather the edges with sandpaper so the new coat doesn’t leave a visible ridge once it’s dry.
- Prepare and dry the substrate. Clean off dirt or mildew and give the surface real time to dry out completely. Skip this, and you’re basically starting the whole cycle over again.
- Repair any damaged wood. Small gaps can usually be filled with exterior-grade filler. Wood that has deteriorated beyond repair may need to be removed and replaced before the surface is repainted.
- Apply primer where it makes sense. Bare or freshly repaired wood generally needs a primer that matches the coating system going on top of it.
- Repaint under suitable conditions. Follow the product’s guidance, stay off it during extreme heat or direct sun, and give each coat the time it needs to dry before the next one goes on. For larger areas where blistering has affected multiple sections of siding or trim, exterior house painting can address the preparation and repainting as one complete project.
There’s no single formula that covers every blister out there. A small dry spot from a hot painting day calls for a lot less work than a wide patch sitting over water-damaged siding, and step two is usually what tells you which situation you’re actually in.
Primer And The Coating System
Primer has a job in this process, but it’s not a cure for moisture that’s still finding its way to the wall. The proper primer can help prepare bare or repaired areas for the new coating, but it is not a replacement for fixing an ongoing moisture problem. The primer helps prepare bare or repaired areas for the new coating, but it is not a replacement for fixing an ongoing moisture problem.
If moisture is still getting through, primer alone isn’t going to stop the next blister from showing up. The primer really comes down to what surface you’re dealing with. Bare wood needs something different than previously painted wood, and old failing coatings might call for yet another approach.
What Happens If The Cause Isn’t Addressed
Painting over a blistered wall without addressing the cause may only hide the problem temporarily. Loose paint needs to be removed, damaged areas repaired, and the surface allowed to dry fully before applying a new coating. Proper exterior paint preparation helps create a clean, stable surface so the new paint can bond properly and last longer.
| A note for older homes: Homes built before 1978 may have older layers of lead-based paint, so scraping or sanding those surfaces requires appropriate precautions. Scraping and sanding those surfaces calls for real caution, and testing before you start disturbing the paint is worth the extra time it takes. |
Preventing Blistering On Cleveland Homes
Cleveland doesn’t make this easy, with hard freezes in winter and sticky humidity rolling off the lake all summer working against exterior paint year-round. None of that guarantees you’ll deal with blistering, but a few habits go a long way toward keeping it from becoming a repeat problem.
- Keep gutters clean and directed away from the foundation.
- Check that sprinklers aren’t hitting painted siding directly.
- Make sure attic and wall ventilation is functioning properly.
- Avoid painting during extreme heat or direct afternoon sun.
Several of these checks can be done during a routine walk around the property. Finding drainage, caulking, or ventilation problems early can help prevent the same paint failure from returning.
When Professional Repair Makes Sense
Plenty of blistering is a fine weekend project, especially when it’s confined to a small area with an obvious cause. Other times it’s not so simple. Blistering spread across several walls, a cause you can’t pin down, or soft wood turning up once you start scraping are good reasons to call someone who does this kind of work regularly and can tell apart problems that look nearly identical but need different fixes.
Frequently Asked Questions
Can I paint over small blisters if they’re not spreading?
Depends on what’s causing it and what’s underneath. A dry, stable blister isn’t the same concern as one sitting over damp or soft wood. Check the substrate first rather than just assuming it’s fine.
How long should I wait to repaint after fixing blistered areas?
The surface needs to be clean and completely dry before you prime, and every coat after that needs time to dry before the next one goes on. The correct waiting time depends on the coating, surface conditions, and the manufacturer’s instructions.
Does blistering always mean my siding or wood is damaged?
Not always. Sometimes it’s purely a surface reaction to heat or how the paint was applied, with nothing wrong underneath. Wood that’s soft or discolored, though, usually points to moisture that’s been sitting there a lot longer than the paint alone would explain.
Is blistering covered under a paint warranty?
That’s going to depend on the specific product and whatever terms the manufacturer or the contractor who applied it laid out. Your best bet is checking the original paperwork or just asking whoever did the work.
What’s the difference between blistering and bubbles that show up right after painting?
They can look similar, but they aren’t necessarily the same problem. Bubbles that appear while paint is still wet can result from application issues such as excessive brushing or rolling, while true blistering involves the paint film lifting from the underlying surface.
Getting Blistered Paint Fixed The Right Way
Blistering usually comes down to trapped moisture, heat during application, or weak surface prep, and lasting repairs mean fixing that cause, not just the paint. Knapp Painting LLC is a licensed and insured painting company serving homeowners across Cleveland, OH.
Our team handles everything from blister and peeling paint repair to full surface prep, priming, and exterior repainting, so the fix actually holds instead of coming back next season. Call +1 567-274-2211 for a straightforward plan to get it fixed right.