Painting tanks and vessels is a vital process in various industries, from oil and gas to water treatment and even in some unique areas like pet care. Properly painting these surfaces ensures they last longer, resist corrosion, and maintain their efficiency. However, it’s not as simple as picking up a paintbrush. The process requires careful planning and execution to get the best results. Whether you’re looking to paint a large industrial tank or a smaller vessel, knowing how to approach the task is essential. In this blog, we’ll guide you through the proper steps to paint tanks and vessels so that you can do the job right and avoid costly mistakes.
In this guide, we’ll cover everything you need to know about painting tanks and vessels. We’ll dive into the right tools, materials, and techniques for each job, whether it’s a small tank or a large vessel. By the end of this post, you’ll be equipped with the knowledge to ensure your tanks are properly painted, looking great, and protected for years to come. Let’s get started!
Why Paint Tanks and Vessels?
Not only is the painting of tanks and vessels important aesthetically. Indeed, there are a number of practical uses of painting that enable the safeguarding of such structures and their continued operation. It can be metal, concrete, or any other material but a properly coated layer of paint can perform miracles.
Protecting from Corrosion
Corrosion is one of the largest reasons why tanks and vessels should be painted. Tanks, particularly metal tanks such as propane tanks, are prone to rust and damage when exposed to moisture or chemicals. This is possible by applying the appropriate paint type, which ensures that the moisture does not get to the tank surface and cause rust. This is important in those industries where tanks contain materials that can degrade the material as time.
Enhancing Durability and Longevity
The second factor that is important in painting tanks and vessels is to extend their life. The material of the tank or vessel can be eroded in the long run by exposure to elements of the environment like rain, snow, or saltwater. A coating of paint provides a protective layer, which protects the material against all of these adverse effects and makes the tank or vessel more resilient. This is especially pertinent in the case of large-scale vessels or tanks, where a repair or replacement might be expensive to do.
Where Should You Paint Tanks and Vessels?
It is as important as the kind of paint and the technique you use to paint your tanks or vessels, so as to choose the right place. When you are painting tanks at home as in a painted turtle tank, you will need a different arrangement than when you are painting large industrial tanks. These are a few of the considerations of the place where you should carry out this job.
Industrial Settings
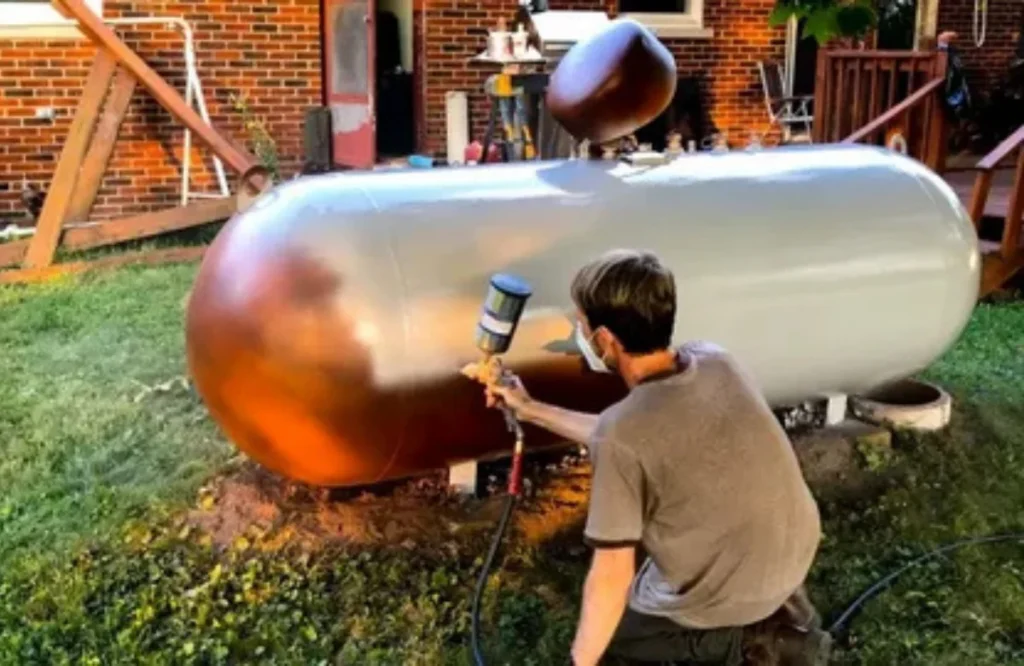
In case of industrial tanks, e.g., propane or LP tanks, it is recommended that the painting be done under controlled conditions, e.g, in a well-ventilated, clean and dry place. This will assist in the correct adhesion of the paint and also in the correct drying without polluting the environment of the final paint. During the process of painting big vessels, it is important to ensure that the space is well ventilated to prevent breathing of paint fumes, particularly when the painting material used is of industrial quality.
Residential or Hobbyist Settings
The smaller tanks, such as a painted turtle tank, or even a pet paint shark tank, should be painted in a space where the paint will not be subject to dust, dirt or moisture in the drying process. In such situations, a room with good light and a lot of ventilation would suffice. Always make sure to cover surfaces that are around so that they are not oversprayed.
How to Properly Paint Tanks and Vessels
Having discussed the reason and position of the painting of your tanks and vessels, we shall now proceed to the how of the matter. Painting a tank or a vessel properly requires a number of steps. The steps should be taken in order to have a smooth and lasting finish.
Step 1: Clean the Surface
You have to wash up the surface of the tank or vessel before you can even think of putting in the paint. Any dirt or rust or any form of debris will not allow the paint to stick, which will cause irregular coverage or peeling in the future. To get off the stubborn stains, you might also require a degreaser or special cleaner, depending on the material used to construct the tank
.
In the case of metal tanks such as propane tanks or LP tanks, it is necessary to remove the rust spots before the paint can be applied. It could be achieved with a wire brush or sandpaper. When the paintings are on the vessels or tanks with existing paint, the scraping of the chipped or peeling paint should take place.
Step 2: Prepare the Area
As soon as the surface is clean, it is time to prepare the area. In case you are painting a tank or a vessel of industrial size, put up a containment area to collect any extra paint. Surrounding surface can be covered with drop cloths, tarps or plastic sheeting to avoid undesired splatter.
In case of smaller projects, such as a painted turtle tank or a pet paint shark tank, you may apply masking tape and sheets of plastic as covering on the parts you do not want to paint. Ensure that the tank or vessel is put somewhere where it cannot be disturbed during the drying process of the paint.
Step 3: Choose the Right Paint
It is important to choose the appropriate paint. Not every paint can be applied to all the surfaces and settings. In the case of metal tanks such as propane or LP tanks a quality industrial-grade paint that is meant to be used on metal surfaces and provide resistance to corrosion is used. Most of these paints also resist heat and this is significant to the tanks that are subjected to high temperatures.
In cases of painted vessels that will be immersed in water like a painted turtle tank, make sure that the paint used is safe to aquatic life. Find water-based paints that are not toxic. Look on the label to see any health warnings regarding fumes or other possible harm to pets or people.
Step 4: Apply Primer
Primarily, you must apply an appropriate primer on the surface before commencing painting. This is done especially when you are working over bare metal or rusty surfaces. A good primer gives a smooth and even surface and better adhesion of paint. Select a primer depending on the material you will be working on metal, concrete or plastic.
Step 5: Start Painting
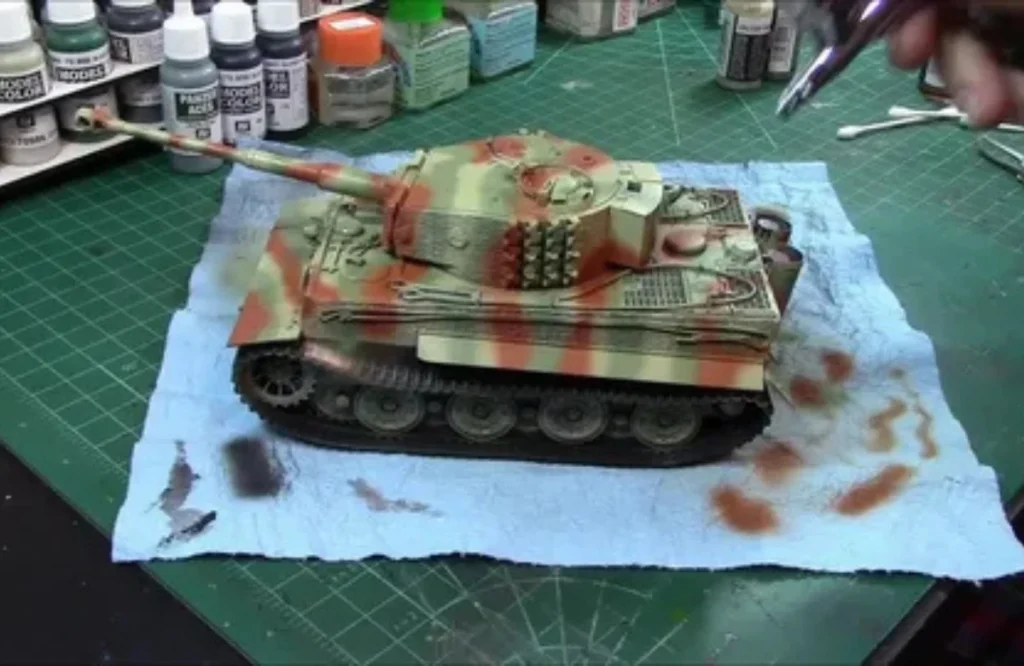
It is time to apply the paint now that the prep work has been done. Paint a paintbrush or spray gun, depending upon the size and type of a tank or vessel. A spray gun will tend to be the most ideal when covering large vessels so as to avoid the appearance of brush strokes. A brush is more controllable with smaller tanks, such as those of a painted turtle.
Use the paint in thin, even strokes. The brush or spray gun should not be overloaded to avoid drips. Allow one coat to dry properly before applying another one. The paint type used might require two to three layers to be applied, depending on the paint.
Step 6: Let It Dry
When you have applied the paint, leave it to dry. The time in which the paint is dry may differ based on the type of paint and the humidity of the surroundings. Painting that is of industrial quality can take hours or even a day to dry. Ensure that you allow your painted propane tanks, LP tanks or any other vessel ample time to cure, then they can be returned into service.
Step 7: Check for Touch-Ups
Once the painting is dry, look at any spots that might require a touch-up. In other instances, small defects may emerge when the initial coating is dry. When you see any irregularities or places of thinness, just do a light touch-up painting and allow it to dry.
Benefits of Properly Painted Tanks and Vessels
Painted tanks and vessels are properly painted, and this comes with a number of advantages which prolong the life of the tanks as well as beautify the vessels. We will consider some of the main benefits of doing this job right.
- Greater Durability: Painted tanks are more durable since the paint serves as a barrier that prevents the surface from being exposed to rust, corrosion and damage by the environment.
- Better aesthetics: The new gloss of paint will transform even the obsolete and battered tanks into something new and more professional, making your arrangement more prestigious and refined.
- Less Maintenance: A good paint job will save you money and time in the long run as you will find that you will do fewer repairs and maintenance.
- Safety: Painted vessels (particularly in industries) are much safer, as it lessen the chances of leakage or corrosion resulting in hazardous cases.
Tips for Successful Tank and Vessel Painting
The following are some of the tips that could prove useful in ensuring that your tank painting is done without any huddles:
- Avoid being exposed to the fumes or splashes of paint by always wearing protective equipment, including gloves, a mask and goggles.
- Apply good paint that is appropriate to the material and to the surroundings.
- Do not hurry the drying. Be careful that each coat is quite dry before applying the next
- In case you are painting a tank, which will be used in the storage of food or water, you should ensure that the paint is non-toxic and is safe to use.
Conclusion
Painting of tanks and vessels is a simple but important activity that needs to be well planned, with the correct materials as well as techniques. Through the measures presented in this guide, you will not only be able to keep your tanks free of corrosion and damage but also make them look good. It is important to remember that it can be a painted propane tank or a smaller and more ornamental painted turtle tank, although all should take their time, use good quality materials, and do everything step by step, in order to achieve the best outcome.
To explore more about tank painting techniques, visit Knapp Painting for expert advice and services.
FAQs
In the case of metal tanks, as in propane or LP tanks, industrial-grade paint is preferable, and this paste must provide resistance to corrosion and also have the ability to withstand high temperatures.
It is true that you can use non-toxic water-based paint to paint your turtle tank, which is not harmful to aquatic creatures. Make sure that the paint is made to be used in tanks where pets are kept.
The time required to dry a paint is determined by the kind of paint applied, however, in most cases, industrial paints can take 4-8 hours to cure. In the instructions of the manufacturer, always use the guidelines related to particular drying times.
Yes, primer is an important step in improving the adhesion of the paint, particularly when it comes to applying it to rusty or bare metal surfaces.
It is possible to paint tanks outside, however, I suggest a dry day. It is not advisable to paint when the weather is extremely windy or humid because it may influence the drying of the painting and the finish of the paint used.